
The Easiest, Quickest and Most elegant way to set up Django 2 Gallery
20 Jul, 2020
How to make beautiful, responsive, gallery in Django
There is repo on GitHub in case you want to clone the code.
I was struggling many times with making my own custom Gallery or with just adding different options for photos. What is the reason of reinventing the wheel? I did not know this solution and I was tired of reviewing apps and repos that are not maintained anymore.
The lightbox itself is an old technology but it’s maintained and alive. Works very well and out of the box. You can see some examples here on how smoot it works.
The photologue is also maintained and it has amazing functionalities (see below). It also works with AWS Amazon S3 Bucket.
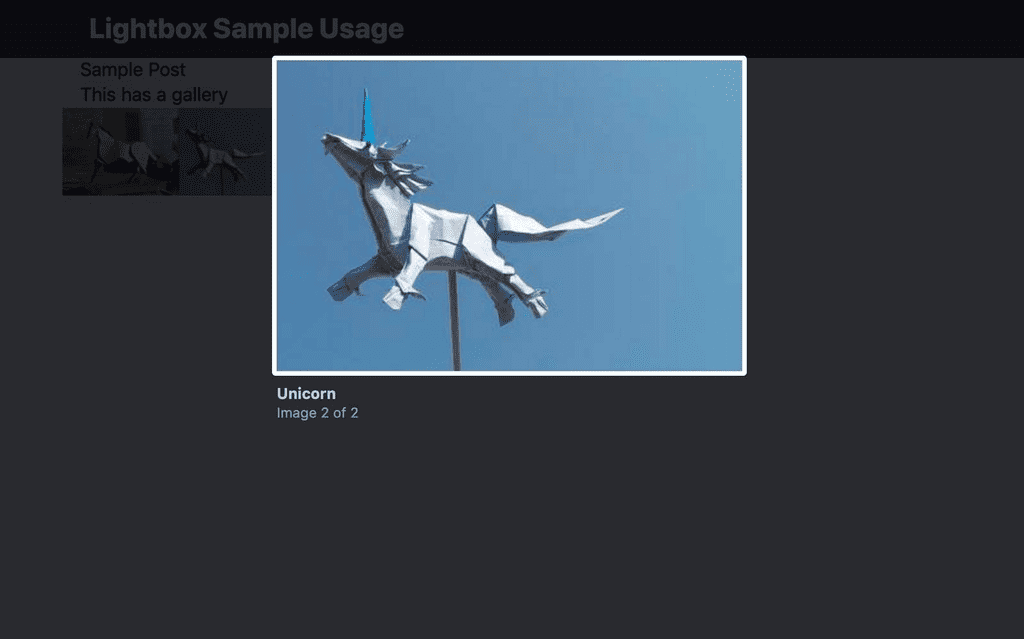
- This is how it looks like in the Template. It’s possible navigate with keyboard between the images and the transition is great.
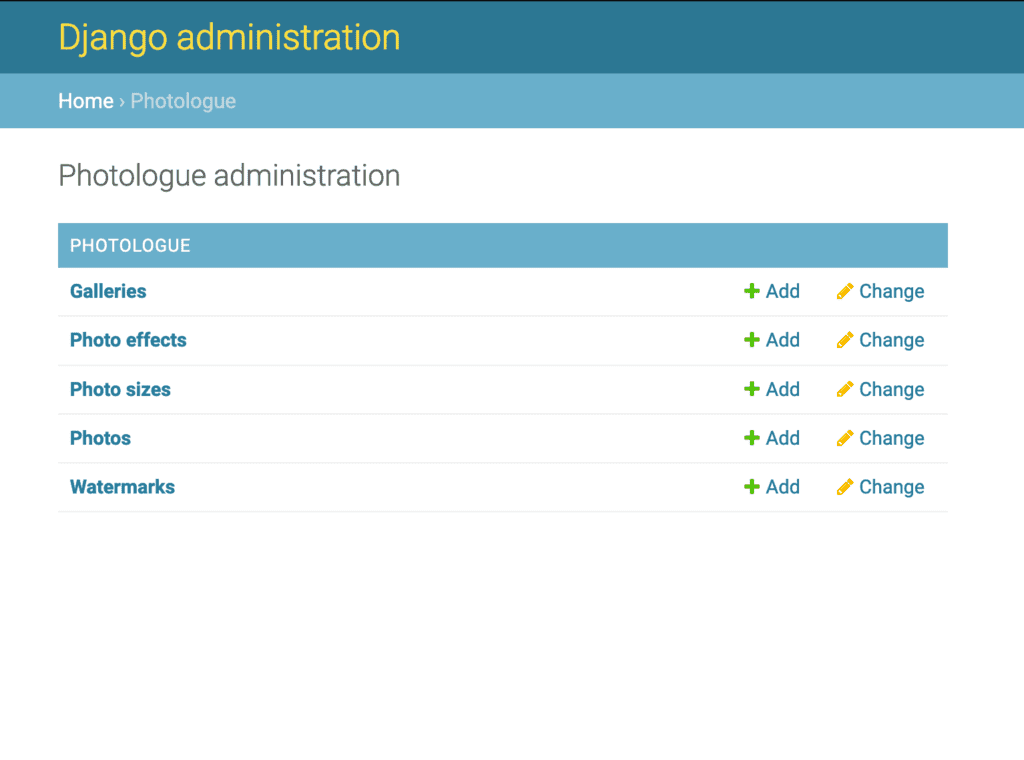
- This is how it looks like in the Admin:
Let’s code it
To implement it in your app you need to do a few things:
- Download lightbox and unzip it. I would not recommend adding CDN since there are different versions and some of them require initializing the galleries separately.
- Load JS and CSS as static files. You can load a lightbox+jquery file from zipped package or you can load just lightbox JS in case you are already using JQuery.
	<!--Lightbox CSS -->
	<link href="{% static 'lightbox.css' %}" rel="stylesheet">
</head>

...
    <!--Lightbox and JQuery-->
    <script src="{% static 'lightbox-plus-jquery.js' %}"></script>
</body>
Don’t forget about
python3 manage.py collectstatic- Install photologue and extend your model that has photos/gallery. In my case it´s a blog post and FOreignKey. Your case might be different. Everything depends on DB relations you need to apply.
from django.db import models
from photologue.models import Gallery
# Create your models here.
class Post(models.Model):
    gallery = models.ForeignKey(Gallery, on_delete=models.SET_NULL, null=True)

    title = models.CharField(max_length=199)
    content = models.TextField()

...- Pass your models to views.
from django.shortcuts import render
from .models import Post

def homepage(request):
    post_list = Post.objects.all()
    context = {}
    context['post_list'] = post_list
    return render(request, 'base.html', context)
Add the view to URL
urlpatterns = [
    path('', homepage, name='homepage'),
]- Iterate through gallery loaded into Template context.
<div class="container">
  {% for post in post_list %}
  <h1>{{post.title}}</h1>
  <p>{{post.content}}</p>

  <!--Gallery-->
  <div class="row">
    {% for photo in post.gallery.sample %}
    <a
      class="align-self-center"
      title="{{ photo.title }}"
      href="{{ photo.get_display_url }}"
      data-lightbox="gallery-example"
      max-height="150px"
    >
      <img src="{{ photo.get_thumbnail_url }}" />
    </a>
    {% endfor %}
  </div>
  {% endfor %}
</div>
The Photologue has getdisplayurl for big photos and getthumbnailurl for thumbnails. You can customize their sizes, effects and more in your Django admin!
The only thing to make lightbox 2 work is part of HTML tag:
data-lightbox="NAME_OF_YOUR_GALLERY"so don´t miss it! Also in case you want to have more than one galleries remember to change those tags e.g. :
<!--first galery with 3 photos:-->

<a href="{{ photo.get_display_url }}" data-lightbox="FIRST_GALLERY" max-height="150px"><img src="{{ photo.get_thumbnail_url }}" ></a>
<a href="{{ photo.get_display_url }}" data-lightbox="FIRST_GALLERY" max-height="150px"><img src="{{ photo.get_thumbnail_url }}" ></a>
<a href="{{ photo.get_display_url }}" data-lightbox="FIRST_GALLERY" max-height="150px"><img src="{{ photo.get_thumbnail_url }}" ></a>

<!--second galery with 2 photos:-->

<a href="{{ photo.get_display_url }}" data-lightbox="SECOND_GALLERY" max-height="150px"><img src="{{ photo.get_thumbnail_url }}" ></a>
<a href="{{ photo.get_display_url }}" data-lightbox="SECOND_GALLERY" max-height="150px"><img src="{{ photo.get_thumbnail_url }}" ></a>
I hope this 🖼️ Gallery solution came in handy!
Did you make progress when using this post? Tell me about your insights. Leave a comment with You are most welcome to see more posts of this type just go to home page
I have also written about:


